

Chicken Pot Pie with Biscuits
Why You’ll Love This Chicken Pot Pie
There’s nothing quite like the comfort of a homemade chicken pot pie, especially one topped with golden-brown biscuits. This recipe brings together tender chicken, mixed vegetables, and a creamy sauce that gives you a warm hug in every bite. Perfect for busy weeknights or a cozy dinner, this chicken pot pie is both satisfying and easy to prepare. Imagine the delightful aroma wafting through your kitchen as it bakes. Your family will be gathering around the table in no time, eager to dig in!
Why This Recipe Works
- Quick prep and minimal clean-up.
- Budget-friendly ingredients.
- Family-approved and kid-friendly.
- Can easily be made ahead.
- Perfect for meal prep and freezer friendly.
This recipe works particularly well thanks to its straightforward methods and the use of pre-cooked chicken, which speeds up the process without sacrificing flavor. You may also find Creamy Chicken Pot Pie With Orzo And Shredded Chicken useful.
Ingredients

You may also find Chipotle Honey Chicken Thighs With Smoked Gouda Mashed Potatoes useful.
- 2 cups cooked chicken, diced
- 1 cup frozen mixed vegetables
- 1/3 cup butter
- 1/3 cup all-purpose flour
- 1/2 teaspoon salt
- 1/2 teaspoon black pepper
- 1 cup chicken broth
- 2/3 cup milk
- 1 can refrigerated biscuits
When selecting your chicken, opt for high-quality, hormone-free varieties for the best flavor. You can also substitute the chicken with rotisserie chicken for even more convenience. For those with dietary needs, consider using gluten-free flour or dairy-free alternatives like almond milk.
Step-by-Step Directions
-
Preheat the oven: Start by preheating your oven to 400°F (200°C). A hot oven helps achieve that beautifully golden crust.
-
Melt the butter: In a large skillet over medium heat, melt the butter. Be mindful not to let it brown too much; you want it just melted, not browned.
-
Make the roux: Stir in the flour, salt, and pepper until the mixture is smooth. A smooth texture at this stage prevents lumps in the sauce.
-
Add chicken broth and milk: Gradually add the chicken broth and milk, stirring constantly. Keep stirring until the mixture thickens—this should take about 5 minutes.
-
Combine the filling: Stir in the cooked chicken and frozen mixed vegetables. Ensure everything is coated in the creamy mixture for the best flavor.
-
Prepare the baking dish: Pour the filling into a greased baking dish, spreading it out evenly for even cooking.
-
Top with biscuits: Place the refrigerated biscuits on top of the filling. Don’t worry if they don’t cover everything; they will puff up while baking.
-
Bake: Bake for 25-30 minutes or until the biscuits are golden brown. The aroma filling your kitchen will let you know it’s almost ready!
-
Serve: Let it cool for a few minutes before serving to allow the filling to set. Enjoy this comforting dish with family or friends!
Serving Suggestions
Serve the chicken pot pie with a side salad for a complete meal. For a cozy evening, pair it with a glass of white wine. The rich and creamy texture complements any side dish beautifully. For an appealing presentation, serve it in individual ramekins topped with biscuit rounds for a touch of elegance.
Storage and Reheating
Store any leftovers in an airtight container in the refrigerator, where they will last for up to 3 days. If you need longer storage, freeze the chicken pot pie in a suitable container for up to 2 months. When reheating, do so in the oven to maintain the biscuit’s crispiness—microwaving may make them soggy.
Common Mistakes and Pro Tips
- Flavor technique: Enhance the flavor by adding herbs like thyme or rosemary when making the roux for a fresh aroma.
- Texture trick: To prevent a soggy bottom, ensure your filling is not too watery before adding the biscuits on top.
- Mistake to avoid: Avoid overcooking the filling before baking; it should be just thick enough to spread but not too thick.
- Ingredient upgrade: Using freshly cooked chicken from a rotisserie can deepen the flavor profile significantly.
- Time-saving technique: Prepare the filling a day in advance and store it in the refrigerator for a speedy assembly and bake when you’re ready.
Variations
Spicy Version
Add diced jalapeños or a splash of hot sauce to the filling for a nice kick. This variation is perfect for those who love a bit of heat in their comfort food.
Lighter and Healthier Version
Substitute the butter with olive oil and use low-fat milk. You can also add more vegetables to the filling, such as spinach or squash, for added nutrition without sacrificing flavor.
Vegetarian or Vegan Version
Replace the chicken with a mix of hearty mushrooms and zucchini. Use vegetable broth instead of chicken broth, and opt for plant-based milk and vegan biscuits to keep this dish fully plant-powered.
FAQ
Q: Can I make this dish ahead of time?
A: Yes, you can prepare the filling the day before and store it in the refrigerator. Just add the biscuits and bake before serving.
Q: Why does my filling look too runny?
A: If your filling is too watery, make sure to cook it long enough to thicken before pouring it into the baking dish.
Q: What’s the best substitute for cooked chicken?
A: A rotisserie chicken is a great substitute for cooked chicken, saving you time and adding flavor.
Q: How long does this chicken pot pie keep?
A: It will stay fresh in the fridge for about 3 days when stored properly.
Q: How can I adjust the batch size?
A: To make a larger batch, simply double the ingredients and use a bigger baking dish. Adjust baking time as needed.
Q: Do I need to cook the vegetables first?
A: No, the frozen mixed vegetables will cook perfectly while baking, so you don’t need to pre-cook them.
Conclusion
There’s no better way to enjoy a weeknight dinner than with a warm, hearty chicken pot pie. The combination of flaky biscuits and creamy filling is sure to satisfy. For a delightful twist on traditional recipes, check out the Chicken Pot Pie with Biscuits from The Cozy Cook or learn more about another delicious take from Pinch of Yum. Gather your ingredients and give this comforting recipe a try!
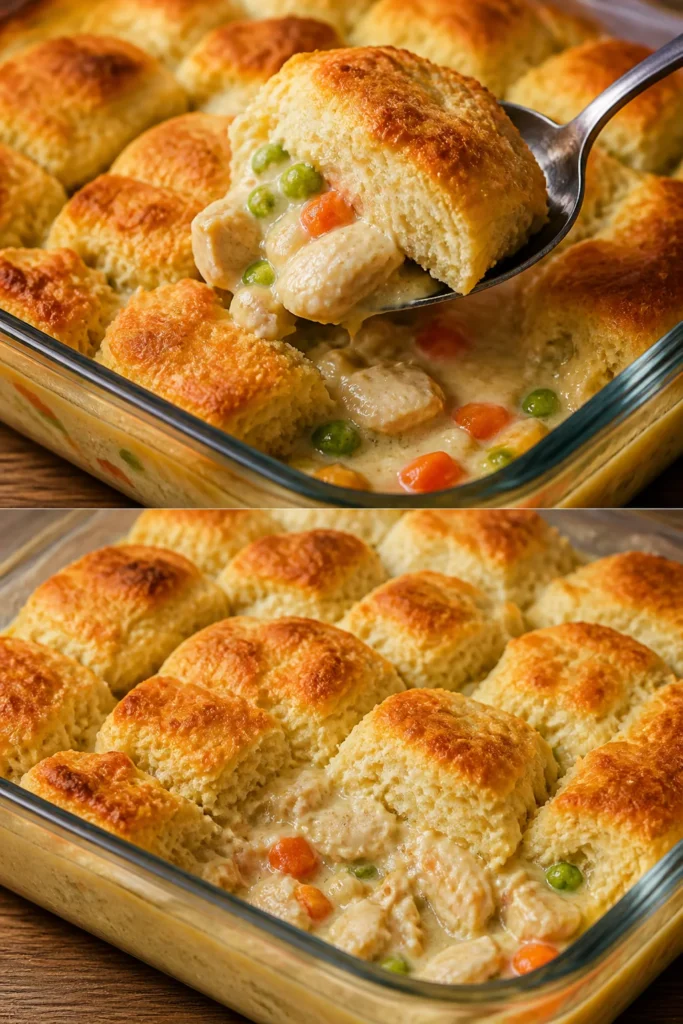
Chicken Pot Pie with Biscuits
Ingredients
Method
- Preheat your oven to 400°F (200°C).
- In a large skillet over medium heat, melt the butter until just melted.
- Stir in the flour, salt, and pepper until smooth.
- Gradually add the chicken broth and milk, stirring constantly until the mixture thickens, about 5 minutes.
- Stir in the cooked chicken and frozen mixed vegetables until well-coated.
- Pour the filling into a greased baking dish, spreading it evenly.
- Place the refrigerated biscuits on top of the filling.
- Bake for 25-30 minutes or until the biscuits are golden brown.
- Let it cool for a few minutes before serving.