About Homemade Banana Pudding Bars
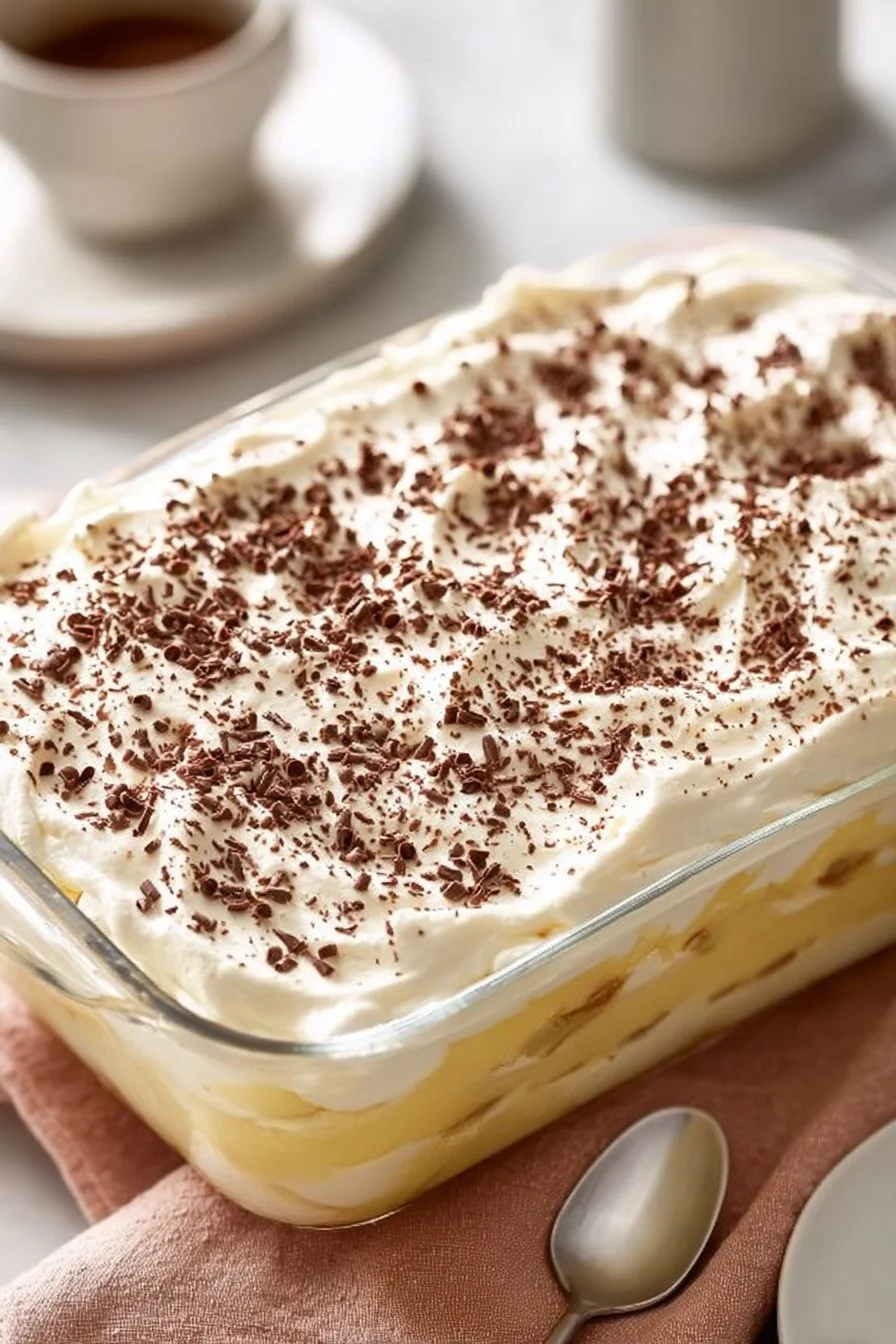
Homemade Banana Pudding Bars are a soft, creamy, and sweet dessert that brings comfort with every bite. The top is light and creamy like a pudding, with a gentle banana flavor and a tender crumb under it. When you bake them, the kitchen fills with a warm, sweet smell of bananas and vanilla. The texture is smooth and slightly dense, with a crumb or cookie base that gives a small, pleasant bite. People have loved banana pudding for decades because it is simple, familiar, and rich without being heavy. These bars take that classic dish and put it into a neat, easy-to-slice form. They are perfect for picnics, potlucks, or a simple family treat.
This version is quick to make. You mix a pudding-like filling and spread it over a simple crust, then bake. You do not need special tools. If you love banana desserts, you might also enjoy a tried-and-true classic banana bread recipe that pairs well with these bars. The bars stay soft in the fridge and they cut clean when chilled. They please both kids and adults because the flavors are mild, sweet, and very comforting. The result looks like a slice of a layered dessert, but it is easier than layered recipes. Once you taste the creamy banana filling with the buttery base, you will want to make them again.
Why make this recipe
- Crowd-pleaser: Most people like bananas and vanilla, so these bars win at parties and family gatherings.
- Time-saving: The recipe uses a quick pudding-style filling and a simple crust, so total time is shorter than a full layered trifle.
- Budget-friendly: The ingredients are common and low-cost—bananas, milk, sugar, flour, and butter.
- Beginner-friendly: The steps are simple and use basic techniques like mixing, mashing, and baking. No special skills required.
- Make-ahead friendly: You can bake ahead and chill, which makes day-of serving easy.
- Versatile: You can change the crust or topping to fit taste or diet needs.
- Portable: Bars travel better than pies or puddings, making them great for potlucks and picnics.
This version balances ease and flavor. It uses a baked base that holds the filling and a thick, spoonable pudding that firms up in the oven. That gives a neat slice that is less messy than scoopable pudding.
How to make Homemade Banana Pudding Bars
The main idea is to build a sturdy base and a creamy banana layer that sets when baked and chilled. First, you make a crust or base that is slightly firm. This base gives structure and a buttery contrast to the soft filling. Next, you make a banana-pudding style filling. The filling needs some starch and eggs or a cooked pudding mix to thicken. The starch coagulates and sets when heated, while eggs add richness and help the filling hold its shape. When the bars bake, the edges of the filling firm first and the center follows. Cooling the bars stops cooking, which prevents a curdled texture and keeps the filling smooth.
We often mash bananas to release their natural sugar and flavor. Riper bananas give more sweetness and banana aroma. Vanilla and a pinch of salt lift the banana flavor. A light baking step helps the top form a thin, slightly golden skin without drying the filling. Chilling the bars fully makes slicing clean and improves texture. The goal at each step is balance: a crust that supports but does not overpower and a filling that is creamy yet sliceable.
Ingredients
- 1 1/2 cups all-purpose flour
- 1/2 cup granulated sugar
- 1/2 cup powdered sugar
- 3/4 cup cold unsalted butter, cut into small pieces
- 2 cups mashed ripe bananas (about 3 medium to large bananas)
- 1 cup whole milk
- 1/2 cup heavy cream or additional milk
- 3 large eggs
- 1/2 cup granulated sugar (for filling)
- 3 tablespoons cornstarch
- 1 teaspoon pure vanilla extract
- 1/4 teaspoon salt
- Optional: sliced bananas for top, crushed vanilla wafers or cookies for topping
Choose ripe bananas with brown freckling on the peel. They are sweet and have a strong banana smell. For the best crust, use cold butter and mix until pea-size bits remain; that gives a tender base. Use whole milk or a mix with cream for the richest flavor. Fresh eggs give the best structure for the filling.
Substitutions:
- Dairy-free: Use coconut milk or almond milk and vegan butter to make a dairy-free version.
- Gluten-free: Replace all-purpose flour with a 1-to-1 gluten-free blend for the crust.
- Lower sugar: Use a sugar substitute made for baking, but keep cornstarch to help thicken.
If you want other dessert ideas with a simple bar format, try a simple apple bars recipe for a fruity change.
Directions
- Prep and preheat:
- Preheat oven to 350°F (175°C). Grease or line a 9×13-inch pan with parchment so bars lift out easy.
- You should smell a faint oven warmth when ready. Preheating gives even baking.
- Make the crust:
- In a bowl, mix 1 1/2 cups flour, 1/2 cup granulated sugar, and 1/2 cup powdered sugar.
- Cut in 3/4 cup cold butter with a fork or pastry cutter until the mix looks like coarse crumbs with pea-size butter bits.
- Press evenly into the prepared pan. The surface should look smooth and packed, not crumbly.
- Bake 12–15 minutes until the edges are pale gold and it sounds firm when tapped. The crust will smell buttery and slightly sweet.
- Prepare banana filling:
- Mash bananas until smooth with small lumps. They should smell strongly of banana.
- In a saucepan, whisk 1 cup milk, 1/2 cup heavy cream (or more milk), 3 large eggs, 1/2 cup sugar, and 3 tablespoons cornstarch until smooth. Add 1 teaspoon vanilla and 1/4 teaspoon salt.
- Cook over medium-low heat, whisking constantly. It will start thin, then thicken and make soft bubbles at the edges. When it coats the back of a spoon and leaves a clear line when you run a finger through it, it is ready. This shows the starch and eggs have thickened the liquid.
- Combine and bake:
- Remove vanilla custard from heat and stir in mashed bananas until even. The mixture should be glossy and thick, not runny.
- Pour the banana filling over the hot crust and spread with a spatula to a smooth top. The filling should reach the pan edges and look creamy.
- Bake 18–22 minutes. The edges should puff slightly and the center will set but still jiggle a little when you tap the pan.
- The top may show small browned spots. That is fine.
- Cool and chill:
- Let bars cool at room temperature 30 minutes, then cover and chill in the fridge at least 3 hours, ideally overnight. Chilling firms the filling and makes slicing clean. The bars will smell sweet and banana-forward.
- Slice and finish:
- Run a knife under hot water and dry it before slicing. Cut into squares; the knife should glide through smoothly with clean edges.
- Add banana slices or crushed cookies on top if you like.
Visual cues: crust pale-golden; filling coats spoon and leaves a line; baked bars jiggle slightly in center; chilled bars hold a clean slice.
How to serve Homemade Banana Pudding Bars
- Classic plate: Place a square on a dessert plate, add a dollop of whipped cream and a thin banana slice on top. Dust with a little cinnamon.
- Picnic style: Wrap cooled bars individually in parchment for easy serving at outdoor events.
- With ice cream: Serve warm bars with a small scoop of vanilla bean ice cream for contrast of warm and cold.
- Coffee pairing: Serve with black coffee or a lightly sweetened latte. The bitter coffee balances the sweet banana. Plating tip: Use a small offset spatula to lift bars and place them neatly. Arrange three small bars on a long plate with a ribbon of caramel or chocolate sauce to look professional.
How to store Homemade Banana Pudding Bars
Short-term (fridge):
- Cover the pan tightly with plastic wrap or move bars to an airtight container.
- Keep in the fridge up to 4 days. The texture stays creamy if chilled.
Long-term (freezer):
- Freeze bars for up to 2 months. Wrap each bar in plastic wrap and place in a freezer-safe bag. Press out air.
- To thaw, move a wrapped bar to the fridge for 6–8 hours or overnight.
Reheating:
- Do not microwave frozen bars from hard-frozen state; thaw first in the fridge.
- For a warmed bar, place a single chilled piece on a plate and microwave 10–15 seconds. Check texture; 5–10 more seconds may be needed. Do not overheat or filling may separate and become watery.
- To refresh a refrigerated bar, let it sit at room temperature 15–20 minutes before serving to soften slightly without getting soggy.
Tips to make Homemade Banana Pudding Bars
- Use ripe bananas: Brown-speckled bananas give the best flavor and natural sweetness.
- Keep butter cold for the crust: This makes a flakier, tender base.
- Whisk constantly when cooking filling: This prevents lumps and stops eggs from scrambling.
- Cool before slicing: Chilled bars cut cleanly. Warm bars will smear.
- Taste for sweetness: Bananas vary. If your bananas are mild, add a little extra sugar or vanilla.
- Use a hot knife for clean slices: Run under hot water, dry, and cut.
- Don’t overbake: Slight jiggle in center means doneness. Overbaking dries the filling.
Variation
- The Deluxe Version: Fold in small chopped toasted pecans into the crust and top bars with caramel sauce and whipped cream for a richer treat.
- The Healthy Version: Use less sugar, substitute Greek yogurt for part of the cream, and a whole-grain crust to increase fiber.
- The Tropical Version: Add 1/2 cup crushed pineapple to the filling and sprinkle toasted coconut on top for a pineapple-banana twist.
- The Chocolate Banana: Swirl in 1/2 cup melted dark chocolate into the filling before baking or sprinkle chocolate chips on the crust.
- The Vegan Version: Use plant-based milk and butter and a cornstarch slurry plus silken tofu to thicken instead of eggs.
FAQs
Q: Why is my filling too thin? A: Likely the cornstarch did not cook enough or the ratio of liquid to starch is too high. Cook the filling longer until it coats a spoon and leaves a clear line. If already baked, chill longer to help firm it.
Q: Can I use instant pudding mix instead of cooking a custard? A: Yes. Instant pudding is a quick swap. Use less milk than the package calls for to keep the filling thick. Remember instant pudding sets as it cools; chilling time still helps.
Q: Why do my bars crack on top? A: Cracks come from overbaking or too high oven heat. Bake until just set with slight jiggle and cool slowly. Avoid very high heat.
Q: Can I make these a day ahead? A: Yes. They improve with time. Bake, chill overnight, and slice before serving. The flavor melds and texture firms.
Q: Can I freeze the baked bars? A: Yes. Wrap tightly and freeze up to 2 months. Thaw in the fridge to maintain texture.
Q: What if my bananas are small? How many do I use? A: Use enough to get about 2 cups mashed. That is usually 3 medium bananas. Taste and add a bit more sugar if bananas are not very sweet.
Q: Can I replace cornstarch with flour? A: You can, but cornstarch gives a clearer, silkier texture. Use about double the amount of flour and cook a bit longer to avoid a pasty taste.
Conclusion
These Homemade Banana Pudding Bars give you a soft, sweet, and easy dessert that looks like a special treat yet stays simple to make. For a classic take with a crisp cookie base, see this popular Banana Pudding Bars | Crowd-pleasing dessert for inspiration and plating ideas. If you want a very rich layered bar with extra custard and cookie crumbs, check the recipe for Banana Pudding Dream Bars – 365 Days of Baking for a deluxe version to try next time.
Print
Homemade Banana Pudding Bars
- Total Time: 45 minutes
- Yield: 12 servings
- Diet: Vegetarian
Description
Soft, creamy, and sweet banana pudding bars with a buttery crumb base, perfect for gatherings.
Ingredients
- 1 1/2 cups all-purpose flour
- 1/2 cup granulated sugar
- 1/2 cup powdered sugar
- 3/4 cup cold unsalted butter, cut into small pieces
- 2 cups mashed ripe bananas (about 3 medium to large bananas)
- 1 cup whole milk
- 1/2 cup heavy cream or additional milk
- 3 large eggs
- 1/2 cup granulated sugar (for filling)
- 3 tablespoons cornstarch
- 1 teaspoon pure vanilla extract
- 1/4 teaspoon salt
- Optional: sliced bananas for top, crushed vanilla wafers or cookies for topping
Instructions
- Preheat oven to 350°F (175°C). Grease or line a 9×13-inch pan with parchment.
- Mix 1 1/2 cups flour, 1/2 cup granulated sugar, and 1/2 cup powdered sugar.
- Cut in 3/4 cup cold butter until coarse crumbs form.
- Press evenly into the prepared pan and bake for 12-15 minutes until golden.
- Mash bananas until smooth.
- Whisk together 1 cup milk, 1/2 cup heavy cream, 3 eggs, 1/2 cup sugar, and 3 tablespoons cornstarch.
- Cook over medium-low heat, whisking until thickened.
- Stir in mashed bananas.
- Pour banana filling over the hot crust and spread evenly.
- Bake for 18-22 minutes until edges puff slightly.
- Cool for 30 minutes, then chill in the fridge for at least 3 hours.
- Slice into squares and serve with optional toppings.
Notes
Use ripened bananas for best flavor. Can be made dairy-free, gluten-free, or with lower sugar alternatives.
- Prep Time: 15 minutes
- Cook Time: 30 minutes
- Category: Dessert
- Method: Baking
- Cuisine: American
Nutrition
- Serving Size: 1 bar
- Calories: 250
- Sugar: 15g
- Sodium: 150mg
- Fat: 10g
- Saturated Fat: 6g
- Unsaturated Fat: 3g
- Trans Fat: 0g
- Carbohydrates: 35g
- Fiber: 1g
- Protein: 4g
- Cholesterol: 50mg
Keywords: banana pudding, bars, dessert, quick recipe, easy dessert