What Makes Crispy Halloumi, Eggs and Avocado Power Plate Special
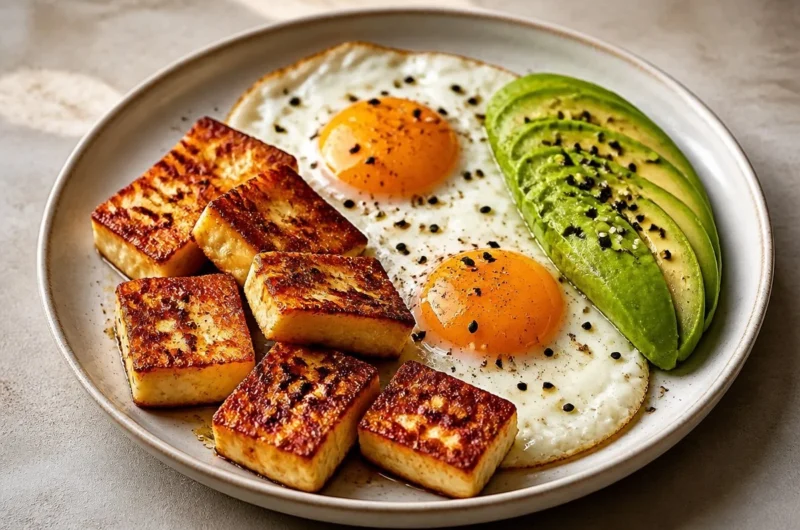
Crispy Halloumi, Eggs and Avocado Power Plate is a delightful dish inspired by Mediterranean flavors. The crispy, salty halloumi pairs beautifully with creamy avocado and perfectly cooked eggs, creating a symphony of textures. Each bite offers a rich combination of savory and fresh notes that makes this dish irresistible. Home cooks adore this easy Crispy Halloumi, Eggs and Avocado Power Plate recipe for its simplicity and standout flavors. You can effortlessly whip it up for breakfast or brunch, making it a perfect way to start your day. You may also find Crispy Fries With Steak And Fried Eggs useful.
Why This Recipe Works
- Quick prep time
- Uses pantry-friendly ingredients
- Budget-conscious
- Beginner-friendly
- Family-tested and approved
This homemade Crispy Halloumi, Eggs and Avocado Power Plate stands out from other recipes because of its focus on balancing textures and flavors. The halloumi provides a satisfying crunch while the eggs offer a creamy richness. The addition of avocado enhances the dish, making it not only delicious but also visually appealing. You may also find Pepper Steak Plate With Crispy Fries And Salad useful.
How to Make Crispy Halloumi, Eggs and Avocado Power Plate
To achieve the best Crispy Halloumi, Eggs and Avocado Power Plate, you need to follow a few simple steps. First, you will slice the halloumi into thick cubes, allowing for a hearty, crisp exterior. Next, cook those cubes in a hot frying pan to achieve that golden-brown perfection. Finally, crack the eggs into the pan and allow them to cook until the whites are just set for a delicious, easy Crispy Halloumi, Eggs and Avocado Power Plate that everyone will love. You may also find Crisp Mango Cucumber Salad With Blueberries And Avocado useful.
Ingredients
- 2 large eggs
- 6 slices halloumi cheese
- 1 ripe avocado, halved
- 1 tbsp olive oil
- 1 tsp black & white sesame seeds
- 1/2 tsp black pepper
- 1/2 tsp salt
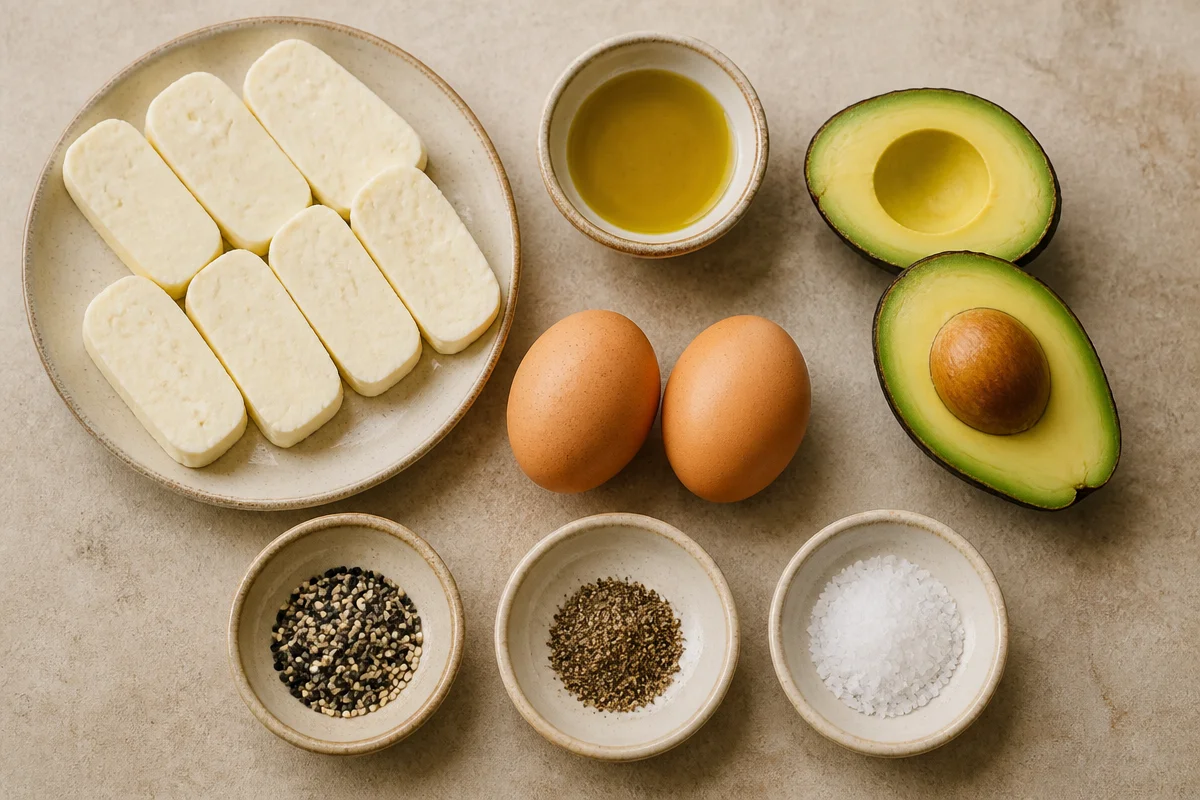
When selecting your ingredients, choose freshly made halloumi for the best flavor and texture. For the avocado, look for one that gently yields to pressure, indicating ripeness. If you’re looking for substitutions due to dietary restrictions, consider using firm tofu in place of halloumi for a dairy-free version, or opt for egg substitutes if you’re following a vegan diet.
Step-by-Step Directions
-
Slice the halloumi: Begin by cutting the halloumi cheese into thick cubes about half an inch wide. This ensures a crunchy exterior while keeping the inside soft and creamy. Avoid cutting the cheese too thin, or it may result in overly crispy pieces that fall apart.
-
Heat the pan: Pour olive oil into a non-stick frying pan and heat it over medium heat until it shimmers. This will create the perfect environment for frying, allowing the halloumi to achieve that signature golden color without sticking. Be careful not to overheat the oil, as it can lead to burnt halloumi.
-
Cook the halloumi: Place the halloumi cubes in the hot pan, letting them cook undisturbed for 2-3 minutes until golden brown on one side. The sizzling sound is a great indicator of proper cooking. Make sure not to crowd the pan to prevent steaming the cheese instead of frying.
-
Add the eggs: Once the halloumi is beautifully crisp, push it to one side of the pan and crack the eggs into the open space. The whites should sizzle as they hit the pan, and cook them just until the whites are set, about 3 minutes. Avoid overcooking the yolks if you prefer them runny.
-
Prepare the avocado: While the eggs are cooking, slice your avocado into wedges and sprinkle them with black and white sesame seeds for added texture and flavor. Be gentle when handling the avocado to avoid browning.
-
Assemble the dish: On a plate, carefully arrange the crispy halloumi, the cooked eggs, and the avocado wedges together. The contrast of colors will make your dish visually appealing and appetizing.
-
Season to taste: Finish by sprinkling additional sesame seeds, salt, and pepper over the entire plate before serving. This will enhance flavor and presentation for your lovely Crispy Halloumi, Eggs and Avocado Power Plate.
How to Serve Crispy Halloumi, Eggs and Avocado Power Plate
For a delightful serving experience, pair your dish with a refreshing cucumber salad for a burst of freshness. A drizzle of balsamic glaze can elevate the flavors even further. You can also serve it with a tall glass of freshly squeezed orange juice to round out the meal. When plating, consider stacking the halloumi, eggs, and avocado at different angles for an eye-catching presentation. This dish is perfect for a casual brunch or as a hearty breakfast for a special occasion.
Storage and Reheating
Crispy Halloumi, Eggs and Avocado Power Plate can be stored in the fridge for up to two days in an airtight container. If you want to freeze it, separate the components into individual containers for freezing, where they can last for up to one month. To reheat, place the halloumi and eggs in a toaster oven or a frying pan over low heat, as this method helps retain the textures without overcooking them. If you’re planning on meal prepping, consider assembling all elements separately to ensure freshness.
Pro Tips
-
Flavor boost: Consider marinating the halloumi in herbs and spices like thyme or chili flakes for a few hours before cooking to enhance flavor further.
-
Crisp factor: For an extra crispy texture, try coating the halloumi slices in a light dusting of flour before frying. This will give the cheese an enjoyable crunch.
-
Common mistake: Avoid overcrowding the frying pan when cooking halloumi, as it can lead to steaming rather than frying. Cook in batches if necessary.
-
Ingredient upgrade: Opt for organic, locally sourced eggs for a richer flavor and healthier option in your dish.
-
Time-saving shortcut: Pre-chop vegetables like avocado and garnish ingredients ahead of time to streamline cooking during busy mornings.
Variations
Spicy Version
For those who enjoy a kick, add sliced jalapeños or a sprinkle of chili powder to the eggs while they cook. This added heat plays harmoniously with the creamy avocado.
Lighter and Healthier Version
You can replace the halloumi with grilled zucchini slices for a lower-calorie choice. Serve with a side of mixed greens dressed in lemon juice for added freshness.
Vegetarian or Vegan Version
Substitute the eggs with tofu scramble and replace halloumi with vegan halloumi or marinaded firm tofu. Pair with avocado for a fulfilling, meat-free meal.
Frequently Asked Questions
Q: Can I make it ahead of time?
A: Yes, you can prepare the halloumi and eggs ahead of time, but it’s best cooked fresh for optimal texture. Store them in the refrigerator and reheat before serving.
Q: How do I fix a texture or consistency problem?
A: If your halloumi turns out too rubbery, it may have been cooked at too high a heat or for too long. Adjust the cooking temperature and time for a softer, melt-in-your-mouth texture.
Q: What’s the best ingredient substitution?
A: If you can’t find halloumi, try using a firm feta cheese or grilled eggplant slices for a different yet satisfying flavor profile.
Q: How long does it keep?
A: This dish can be safely stored in the fridge for up to two days. Be sure to consume it promptly for the best quality.
Q: How can I adjust cooking time for a larger or smaller batch?
A: When scaling the recipe up or down, keep in mind that cooking times may vary slightly. Increase cooking times by a few minutes when cooking larger batches.
Q: What’s a common beginner question specific to this dish?
A: A common question is how to know when the halloumi is ready. Look for a golden color and crispy edges; it should be beautifully browned on the outside and soft inside.
Conclusion
Crispy Halloumi, Eggs and Avocado Power Plate is a fantastic dish that brings together bright flavors and textures, making it perfect for any time of day. You can explore more exciting variations like Greek Bowls for additional inspiration. If you’re interested in a different breakfast combination, check out the Eggs, Halloumi, Avocado Breakfast for a mouthwatering meal idea.

Crispy Halloumi, Eggs and Avocado Power Plate
Ingredients
Method
- Slice the halloumi into thick cubes about half an inch wide.
- Heat olive oil in a non-stick frying pan over medium heat until shimmering.
- Place the halloumi cubes in the hot pan and cook undisturbed for 2-3 minutes until golden brown on one side.
- Push the halloumi to one side of the pan and crack the eggs into the open space, cooking until the whites are just set, about 3 minutes.
- Slice the avocado into wedges and sprinkle with sesame seeds.
- Assemble the dish by arranging the crispy halloumi, cooked eggs, and avocado wedges on a plate.
- Finish by seasoning with additional sesame seeds, salt, and pepper before serving.