What Makes Crispy Garlic Parmesan Chicken Box Special
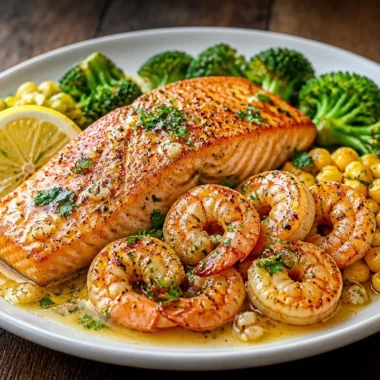
Crispy Garlic Parmesan Chicken Box combines the comfort of classic fried chicken with vibrant, fresh flavors from a simple salad. The aroma of garlic and baked chicken fills your kitchen, creating a mouthwatering scent that draws everyone to the table. This dish offers a satisfying crunch from the cornflakes and parmesan coating, perfectly contrasted by the juicy, tender chicken. Home cooks love making it because it’s simple and delivers a hearty, restaurant-quality meal. The combination of crispy chicken and a colorful salad creates a feast for the eyes and appetite. Just imagine biting into that crunchy exterior, savoring the rich, cheesy taste while the fresh veggies add brightness.
Why This Recipe Works
- Quick prep time
- Uses pantry-friendly ingredients
- Budget-conscious
- Beginner-friendly
- Family-tested and approved
This easy Crispy Garlic Parmesan Chicken Box stands out because it’s completely homemade and gives you the perfect crunch. Unlike many versions online, this recipe uses crushed cornflakes for an extra crispy coating, while the fresh garlic and herbs elevate the overall flavor. You’ll enjoy the way it brings together familiar tastes in a comforting, yet exciting way!
How to Make Crispy Garlic Parmesan Chicken Box
Making your own easy Crispy Garlic Parmesan Chicken Box is straightforward. First, season the chicken for maximum flavor. Next, coat the drumsticks in parmesan and cornflakes to achieve that perfect crunch. Bake until golden brown, ensuring that crispy texture we all love. While the chicken bakes, prepare a refreshing salad of lettuce, cucumber, and cherry tomatoes. These vibrant ingredients balance the rich chicken perfectly. This homemade Crispy Garlic Parmesan Chicken Box not only tastes amazing but also makes for a hearty meal you can feel good about.
Ingredients
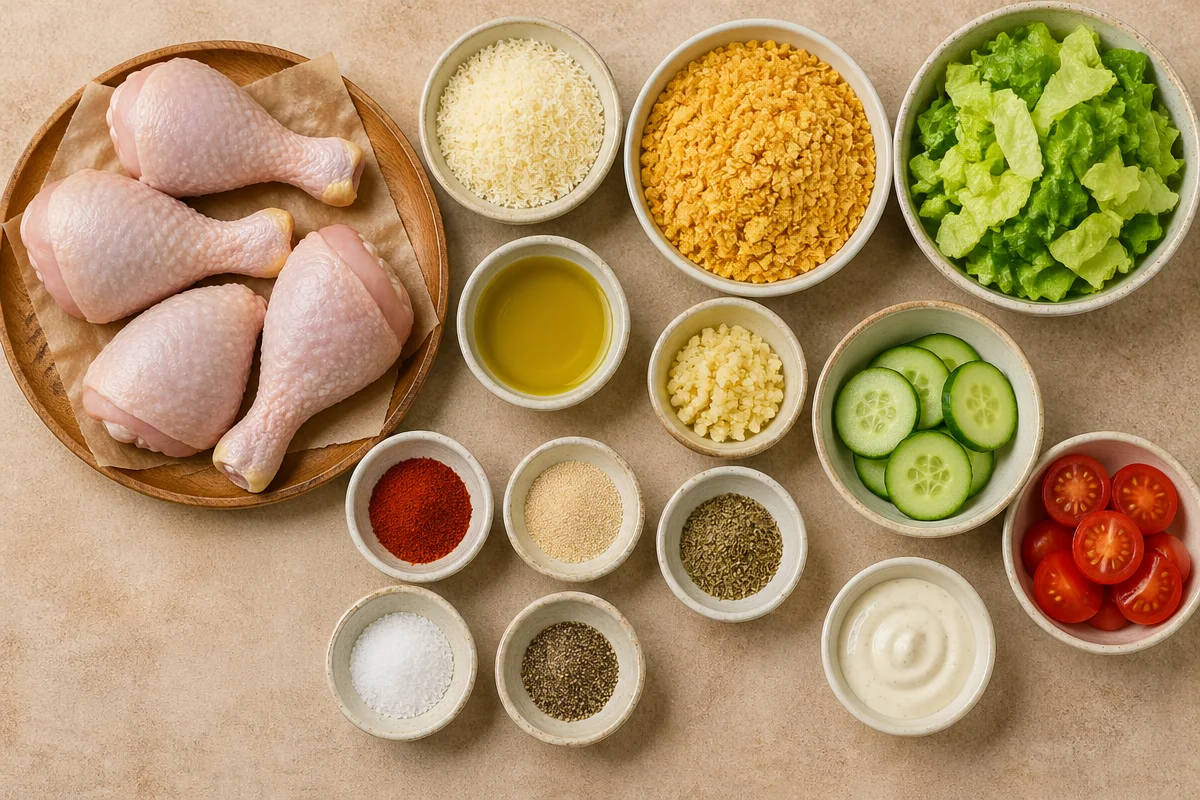
- 4 chicken drumsticks
- 1/2 cup grated parmesan cheese
- 1 cup crushed cornflakes or panko crumbs
- 2 tbsp olive oil
- 2 garlic cloves, minced
- 1 tsp paprika
- 1 tsp garlic powder
- 1 tsp onion powder
- 1 tsp Italian seasoning
- 1 tsp salt
- 1/2 tsp black pepper
- 2 cups lettuce, chopped
- 1/2 cucumber, sliced
- 1/2 cup cherry tomatoes, halved
- 1 tbsp Caesar or ranch dressing (optional)
For the best quality chicken drumsticks, choose fresh, unfrozen pieces with a bright pink hue and no discoloration. When it comes to parmesan, always opt for freshly grated for that richer flavor. For substitutions, try gluten-free breadcrumbs if you’re celiac, or use nutritional yeast instead of parmesan for a dairy-free or vegan option.
Step-by-Step Directions
-
Season the Chicken: Start by preheating your oven to 400°F (200°C). Pat the drumsticks dry; this helps them crisp up beautifully. Then, in a bowl, coat the chicken in olive oil, ensuring it’s evenly covered. Add minced garlic, paprika, garlic powder, onion powder, salt, pepper, and Italian seasoning. Mix thoroughly so each piece is well-seasoned. Avoid over-seasoning; taste should be balanced, not overpowering.
-
Add the Crunch: Once seasoned, take your coated chicken and roll it in the parmesan and crushed cornflakes. This combination adds delightful texture; you’ll hear that satisfying crunch as you press the coating on. Ensure every side is well-coated to avoid bare spots, which can lead to a less crispy texture.
-
Bake to Perfection: Arrange the coated chicken drumsticks on a baking sheet. Bake for 35–40 minutes until they are golden and crispy, and an internal temperature reaches 165°F (73°C). Your kitchen will be filled with tantalizing aromas. Check halfway through to flip them for even cooking. A common mistake is not spacing the pieces; they need room for air circulation to crisp up.
-
Prep the Salad: While the chicken bakes, assemble your salad. Toss together the chopped lettuce, sliced cucumber, and halved cherry tomatoes. Drizzle with dressing if desired. The colors will pop, creating a fresh, vibrant side. Keep the salad separate until serving to avoid sogginess.
-
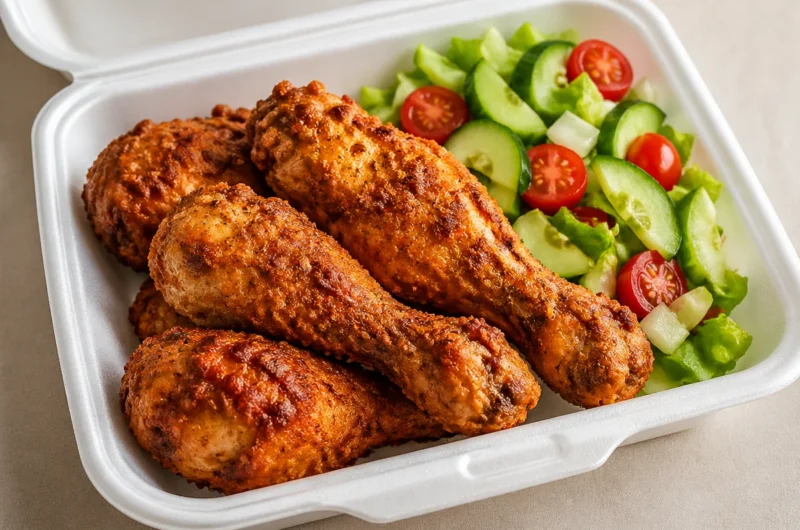
Pack & Serve: Once the chicken is done, serve it hot alongside the salad in a meal box. This creates a delightful contrast between the crispy chicken and fresh veggies. If the chicken cools too much, it’ll lose some crispiness—serve immediately for the best experience.
How to Serve Crispy Garlic Parmesan Chicken Box
Enjoy your Crispy Garlic Parmesan Chicken Box with sides like roasted vegetables or garlic bread for a delightful combination. A chilled glass of lemonade or iced tea pairs well, balancing the richness of the chicken. For presentation, arrange the salad and chicken in a colorful bento box style, making it appealing and fun, perfect for a weeknight dinner or meal prep.
Storage and Reheating
The Crispy Garlic Parmesan Chicken Box can last in the refrigerator for up to three days. Store in an airtight container to maintain freshness. If you decide to freeze it, plan to eat within three months. Let the chicken thaw overnight in the fridge for the best texture. Reheat in the oven at 375°F (190°C) for about 15-20 minutes for that crispy experience once again. Meal prep tip: divide into single portions for easy grab-and-go lunches!
Pro Tips
-
Chef-Level Flavor Technique: For an even bolder taste, marinate the chicken in the olive oil and spices for a few hours before cooking. This deepens the flavor profile.
-
Texture Improvement Trick: For extra crunch, apply a second layer of the cornflake coating by dipping in flour first, then egg, followed by the cornflakes.
-
Common Mistake: Avoid undercooking the chicken. Use a meat thermometer to ensure safety and texture, preventing chewy spots.
-
Ingredient Upgrade: Use freshly grated parmesan instead of pre-packaged; it enhances flavor and richness.
-
Time-Saving Shortcut: Prepare the chicken and salad ahead of time and store separately; this makes weeknight dinner quick and easy.
Variations
Spicy Version
Add cayenne pepper to the seasoning mix for a kick of heat. Consider using spicy cornflake or panko crumbs for extra texture.
Lighter and Healthier Version
Use skinless chicken and substitute olive oil for a light spray of cooking oil. Opt for a yogurt-based dressing for a creamy yet lighter accompaniment.
Vegetarian or Vegan Version
Replace chicken with hearty, breaded eggplant or zucchini slices; bake until golden. Use vegan parmesan or nutritional yeast to replicate that cheesy flavor.
Frequently Asked Questions
Q: Can I make this ahead of time?
A: Yes, you can prepare the chicken and salad separately, then bake the chicken just before serving. This ensures it stays crispy.
Q: How do I fix a texture issue with the chicken?
A: If your chicken turns out too dry, try not baking it too long the next time and ensure it’s at room temperature before cooking.
Q: What’s the best ingredient substitution for this recipe?
A: You can replace chicken drumsticks with thighs or wings, depending on your preference, keeping the same cooking time for consistency.
Q: How long does the dish keep in the fridge?
A: The chicken box can last in the fridge for up to three days if stored in an airtight container.
Q: How do I adjust the cooking time for more or fewer servings?
A: For a larger batch, ensure the chicken pieces aren’t overcrowded on the baking sheet, which may require additional cooking time. For fewer pieces, check for doneness about five minutes earlier.
Q: What do I need to know as a beginner?
A: The key to crispy chicken is in the coating and cooking temperature. Ensure they are well-coated and spread out on the baking sheet for even cooking.
Conclusion
Making your own Crispy Garlic Parmesan Chicken Box is a delicious endeavor you’ll want to repeat. As you savor the crunchy chicken alongside fresh, colorful salad, you’ll appreciate the homemade element even more. Don’t forget to save this recipe for later, share it with friends, and leave a comment about your experience! You might also find these recipes for Crispy Garlic Parmesan Wings and The Best Easy Garlic Parmesan Wings Recipe inspiring!

Crispy Garlic Parmesan Chicken Box
Ingredients
Method
- Preheat your oven to 400°F (200°C) and pat the drumsticks dry.
- In a bowl, coat chicken in olive oil, ensuring each piece is evenly covered.
- Add minced garlic, paprika, garlic powder, onion powder, salt, pepper, and Italian seasoning. Mix thoroughly.
- Roll the seasoned chicken in the parmesan and crushed cornflakes.
- Ensure every side is well-coated to avoid bare spots.
- Arrange the coated chicken on a baking sheet and bake for 35–40 minutes until golden and crispy.
- Check halfway through and flip for even cooking.
- While chicken bakes, toss together chopped lettuce, sliced cucumber, and halved cherry tomatoes.
- Drizzle with dressing if desired and keep the salad separate until serving.
- Serve the crispy chicken hot alongside the salad in a meal box.